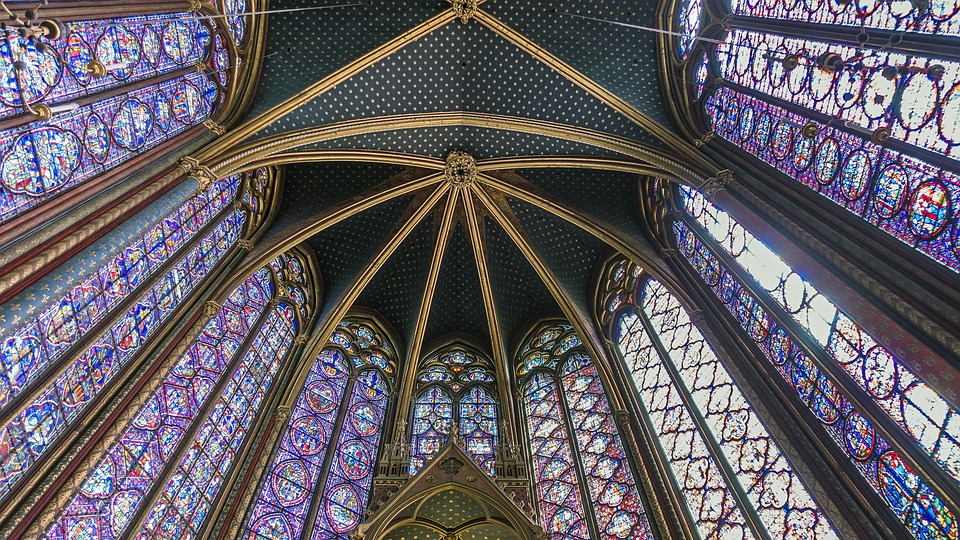
I have always been fascinated by stained glass windows. They are so beautiful and have cast a halo of colour of churches and other historic buildings for generations. But I never knew much about how they were made. So, I decided to take the time to write an article on the subject so that I had an excuse to research into it and discover the rich history and creative process behind the beauty of the stained glass window.
History
Stained glass windows have been around for generations. In fact, the tools employed by craftsmen for making glass date back to at least 5,000 years ago and some forms of stained glass were thought to have been used by European Christian churches by the third and fourth century A.D.
During the rise of the Gothic, during the 12th century, the art of the stained-glass window flourished exceptionally. Today, stained glass windows from the Gothic period can still be seen in religious buildings, residential and industrial architecture. However, stained glass windows are usually recalled most commonly in churches to display chapters of the bible or figures of Mary and Christ for the congregation to view while they worship. Whether you are religious or not, it is difficult to deny the sheer extravagant beauty of the stained glass window. So, just how is a stained glass window made? Read on to find out more!
The Manufacturing Process
Stained glass is still made the same way it was back in the Middle Ages, incredibly. Despite some of the tools being adapted or improved, the manufacturing process of the stained glass window has remained the same for thousands of years.
Molten glass is caught up at one end of a blow pipe in a lump which is then blown into a cylinder. The cylinder is then cut, flattened and cooled. Artisans would use this same process to produce a myriad of effects.
Large manufacturers of stained glass mix the batch of raw materials together and then melt them in a modern furnace at a striking temperature of 2500°F (1371°C). Each ingredient must be carefully measured and weighed to ensure it produces the appropriate colour.
Creating the Window Pattern
Though some of the tools to create stained glass windows have been modernised and improved upon, the traditional skill has been retained and stained glass windows are still hand crafted as they were centuries ago. The first step of the process involves the craftsmen creating a small-scale version of the final design for approval. After the design has been approved, measurements are taken and design of the real-life version is undertaken.
The full-sized drawing of a stained glass window is called the cartoon and is prepared in black and white. From the cartoon, it is possible to make the outside and copy the drawings. The drawing serves as an accurate guide for the subsequent placing of glass pieces and the binding together with lead.
Cutting and Painting
Now comes the fun part, selecting the colours. The pattern is placed on a piece of glass that is the desired colour and is cut around with a diamond, or steel, wheel so that the glass is cut to the shape of the pattern. After the glass has been cut, the main outlines of the cartoon are painted on each piece of glass with a special paint, called ‘vitrifiable’ paint which becomes glassy when heated. During the painting process, the glass is held up to the light to simulate the same conditions it will be in when the window will be seen by onlookers. The painted pieces are then fired in the kiln at least once to fuse the paint and the glass.
Glazing and Leading
Glazing is important for stained glass windows. The cutline drawing is spread out on a table and strips of wood are nailed down along the edges to form a right angle. Long strips of grooved lead are placed along the inside of the laths and the pieces of glass belonging to the angle are fitted into the grooves. A strip of narrow lead is applied around the exposed edge and the next required segment is filled. This step is repeated until each piece of glass has been successfully inserted and sealed with the lead outline to hold it in place.
Finishing
Every joint on the window that has been formed must be soldered, on both sides, to ensure the window will stay together. The entire window is then waterproofed to protect it from the elements and is thoroughly inspected in the light. Finally, the window is completed and is packed and shipped to its destination where it will be carefully installed and secured in place with reinforcing bars.
Final Words
What a process, do you agree? I knew stained glass windows were beautiful but I had no idea just how much work went into perfecting them. I absolutely adore stained glass windows and found it interesting researching this article as I learnt so much about the process behind the beauty!
If you have any questions, or would like to know more, get in touch or leave me a comment below and I will get back to you as soon as I can!